Ok,
so with the release of each Helios Creed show recording on this
website, I include artwork for “jewel” cases, or simply cd cases. Now,
to the average person I can see how printing these to be sized
perfectly for the inserts of a cd case can be a tad confusing, and
tedious. So, I hope these instructions will help you to be able to
easily print the artwork for these website releases. Because, well… it
just looks way COOLER and makes it a bit more special to have these
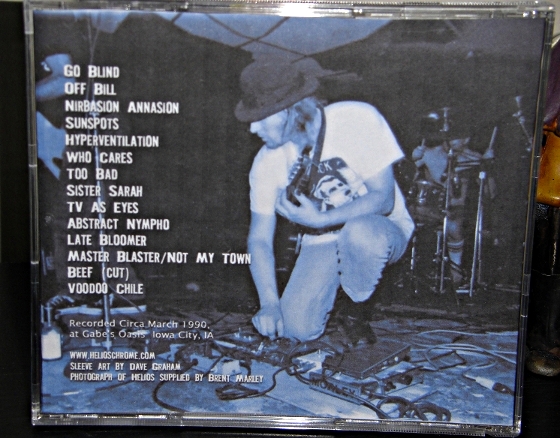
housed in a nice case; you get the cool art and the track listing
conveniently on the back of the case for quick reference. I try to
release only shows that are decent sound quality; soundboards,
exceptional audience recorded shows etc.. Anyway, I mean, come on,
doesn’t this look WAY cooler than shoving the disc in a folder or
something?

CD (JEWEL CASE) ARTWORK PRINTING INSTRUCTIONS
First off, here are the dimensions for artwork inserts standard cd case, like you see in the picture above
Cover: 4.724 x 4.724 inches OR 120 x 120 mm (I always go with mm settings)
*Note: for a cover that features a 2 page fold it would be 9.448 x 4.724 OR you could even do 9.5 x 4.75
Back of the case (with track listing): 5.906 x 4.646 inches or 151 x 118 mm (I always go with mm settings)
Ok, now for an easy step by step set of instructions on printing the art as presented in these releases, see below:
-open folder with artwork & drag the images of the art to your desktop (for easy finding)
-open the images in
an image-editing program such as GIMP (easy free tool) or even “Paint”
that comes on Windows operating systems
-crop the images so that only the artwork itself is left (if needed)
-when you are going
to print, navigate to "image settings" or something similarly titled
and set the size to the above noted dimensions
Printing
-for standard front and back covers you can just print as-is
-for a 2-paged front
cover (2 page spread), as many of the art for these releases are, you
need to set the print settings to "landscape" orientation when you go in to print
*Note: adjust your printer settings prior to printing if you choose to do so (eg: raise quality from “good” to “best” etc.)
-after printing the artwork, just cut it out and then insert accordingly into the cd case
*front of case you would just cut and slip it in there
*back of the case with track list has the sides extended a bit for the
sides of the case (usually lists title, date etc..), for this you need
to fold those as close as you can get it so that it fits nicely into
the case when you snap the piece back in